FAQs

Warranty

  • How Do I File A Warranty Claim?

    We stand behind everything we make. If you have an issue with a HydraPak product, we’re happy to help.

    Submit a warranty claim here and select “File a Warranty Claim.”

    To help us process your claim quickly:

    • List all products on one form. If more than one item needs replacing, there’s no need to submit separate claims.
    • Include a photo that clearly shows the issue.
    • Double-check your shipping address.

    We’ll reply within 2–3 business days.

    Is your product made by HydraPak? We make hydration reservoirs and soft flasks for Osprey, Salomon, Nathan, Katadyn, and many other brands, and our warranty covers them. Look for the HydraPak logo on the back or bottom of your product before you submit a claim.


  • What does the warranty cover?

    We stand behind everything we make for the lifetime of your product. If your product fails because of a defect in materials or manufacturing, we’ll replace it.

    What’s covered:

    • Products made by HydraPak and Polar Bottle
    • Products we make for partner brands, including Osprey, Salomon, Nathan, Katadyn, Ultimate Direction and many other brands

    What’s not covered:

    • Normal wear and tear
    • Punctures, drops and other accidental damage
    • Mold or damage from improper cleaning, storage or neglect
    • Damage from extreme heat or cold
    • Products that have been altered or modified

    How to file a claim

    Visit our Support Center and select File a Warranty Claim.

    HydraPak makes water reservoirs, soft flasks and hydration accessories. HydraPak is not affiliated with HydraPeak, Hydro Flask or HydroPal.


  • Do I need a proof of purchase?

    No.  We do not require proof of purchase for warranty claims but do require a photo or video of the issue you are experiencing. 

  • Do I need to send back my old product?

    No.  You can keep it or dispose of it properly.  If only the reservoir is being replaced, keep your current tube and bite valve to use with the new one.  You can also repurpose your old product as an ice pack by filling up half way with water and storing it in the freezer.  

    If you have a warranty issue with a squeeze bottle we have a RePak recycling program at certain retail locations. Feel free to reach out to our team for more information. 


  • How does my warranty order ship?

    All warranty orders ship via USPS, in the US and internationally.

    • US orders: usually arrive within 3-5 business days after your claim is approved.
    • International orders: allow 4–6 weeks for delivery.

    International shipments may be charged import taxes, customs duties or fees by the destination country. These are paid by the recipient, and HydraPak can't control or predict them.


  • Where do I find the production code on my reservoir?

    The production code is pressed into the material itself, not printed, so it can be hard to spot.

    On a reservoir:

    1. Turn the reservoir so you're looking at the back.
    2. Find the vertical seam on the left side.
    3. Look 1–2 inches (2.5–5 cm) down from the top along that seam.

    Tip: tilt the reservoir toward a light so the raised characters cast a shadow.

    If you can't find it, enter "0000" on the warranty form. Your claim will still be processed.


    HOW-TO-FIND-PRODUCTION-CODE-750.jpg


Product Care

  • How do I Replace a Bite Valve and Sheath?

    How to Replace a Bite Valve

    Bite valves wear out with normal use. If yours leaks or feels worn, you can usually replace just the soft silicone cover (the sheath) in under 30 seconds.  

    Reservoir: replace the sheath

    1. Hold the hard plastic valve body in one hand and the soft sheath in the other. Pull them apart.
    2. Push the new sheath onto the valve body until it's fully seated.

    Reservoir: replace the whole bite valve

    Do this if the hard plastic body is cracked or the valve still leaks with a new sheath.

    1. Hold the tube in one hand and the valve body in the other. Pull firmly to remove it.
    2. Press the new bite valve into the tube.

    SoftFlask: replace the sheath

    1. Pull the old sheath straight off the flask, wiggling it if needed.
    2. Press the new sheath on.

    Tip: stuck valve or tight fit? Fill a mug with hot water (170°F / 77°C). Dip the end of the tube in for 30 seconds to soften it, then pull or press. The plastic will be hot, so grip it with a towel.

    Shop replacement bite valves. Questions? Email info@hydrapak.com or call (303) 440-0358.

    Reservoir Bite Valve, Sheath Replacement


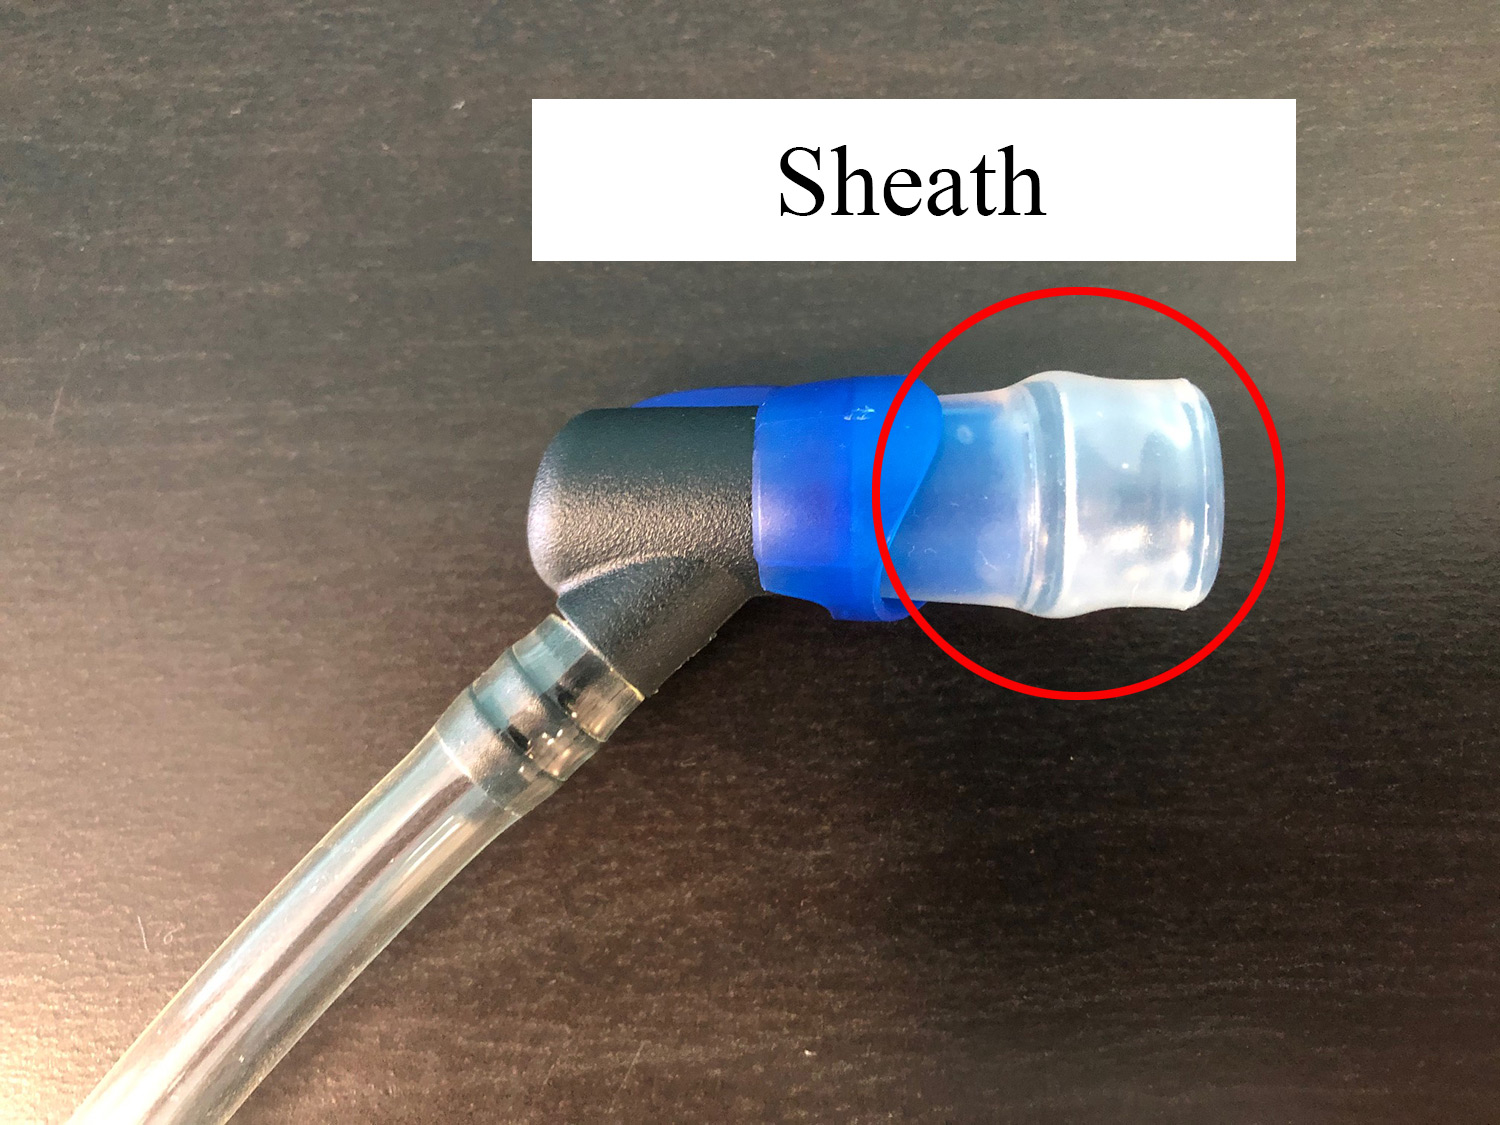
    Replacing the sheath is easy and takes less than 30 seconds.
    sheath-close-up.jpg

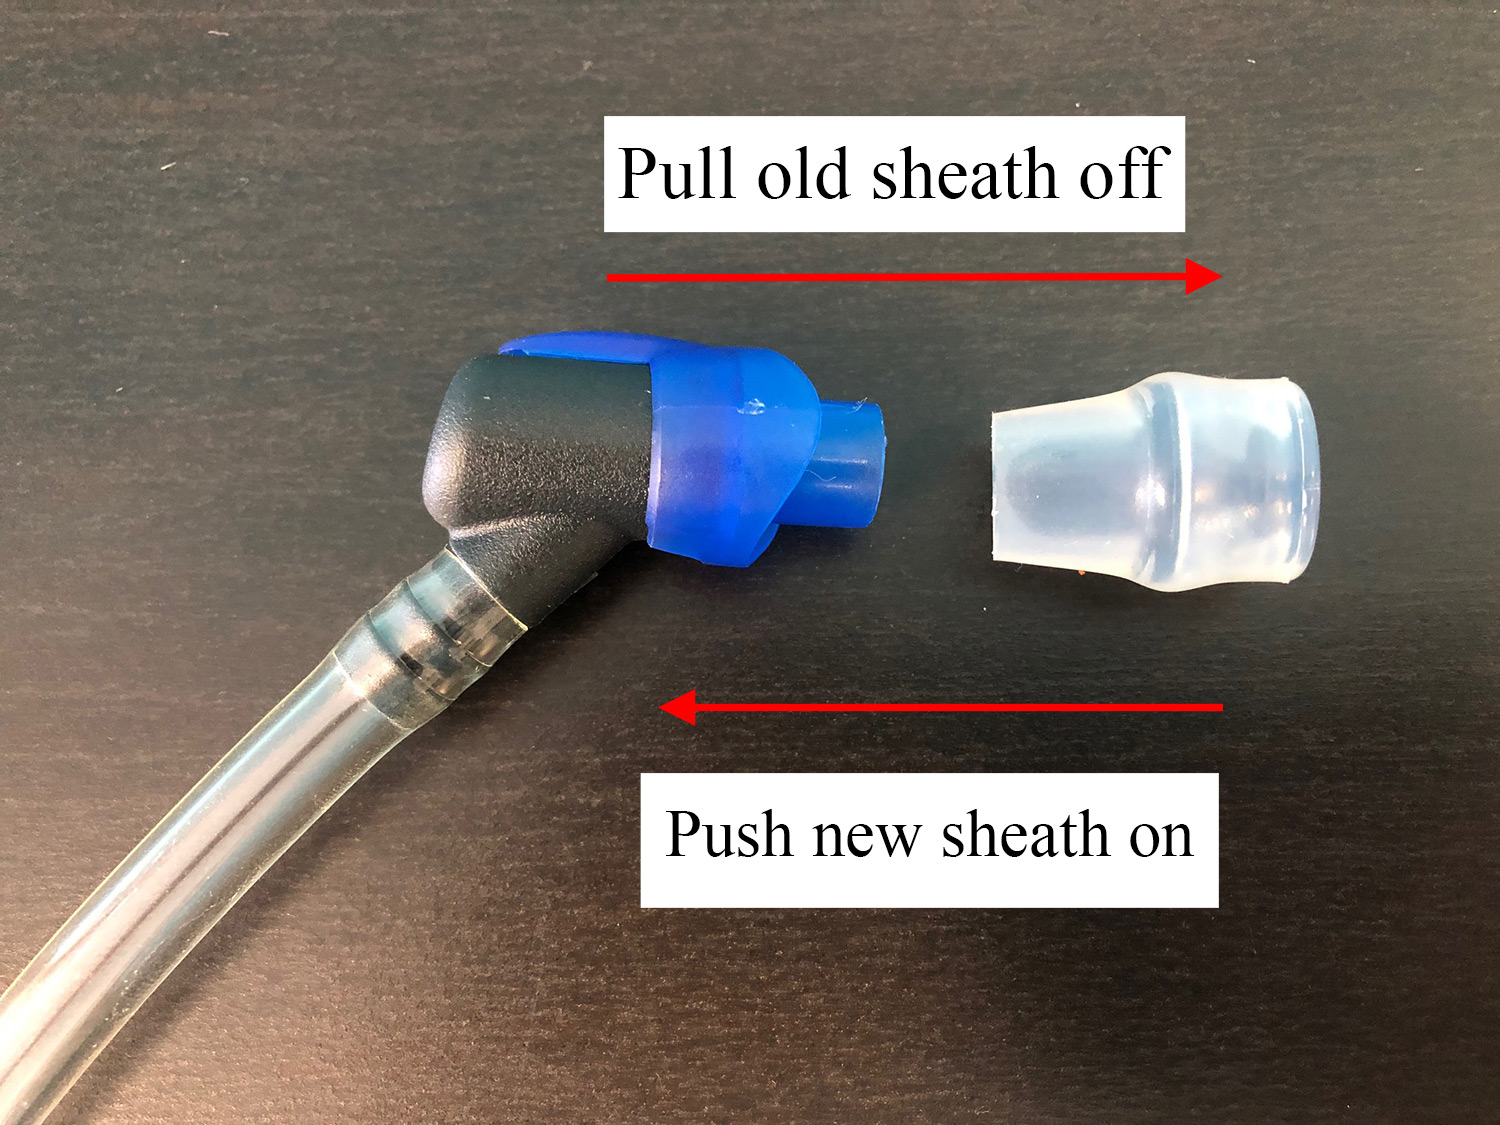
    1. Remove the sheath - Grasp the hard plastic part of the valve and in one hand and the sheath in the other and pull apart. 
    pull-push-sheath-replacement.jpg

    2. Install new sheath by pushing it onto the valve body. The hard plastic center goes inside the bite valve, and the soft plastic surface will slide on the outside.


    Reservoir Bite Valve, Complete Replacement

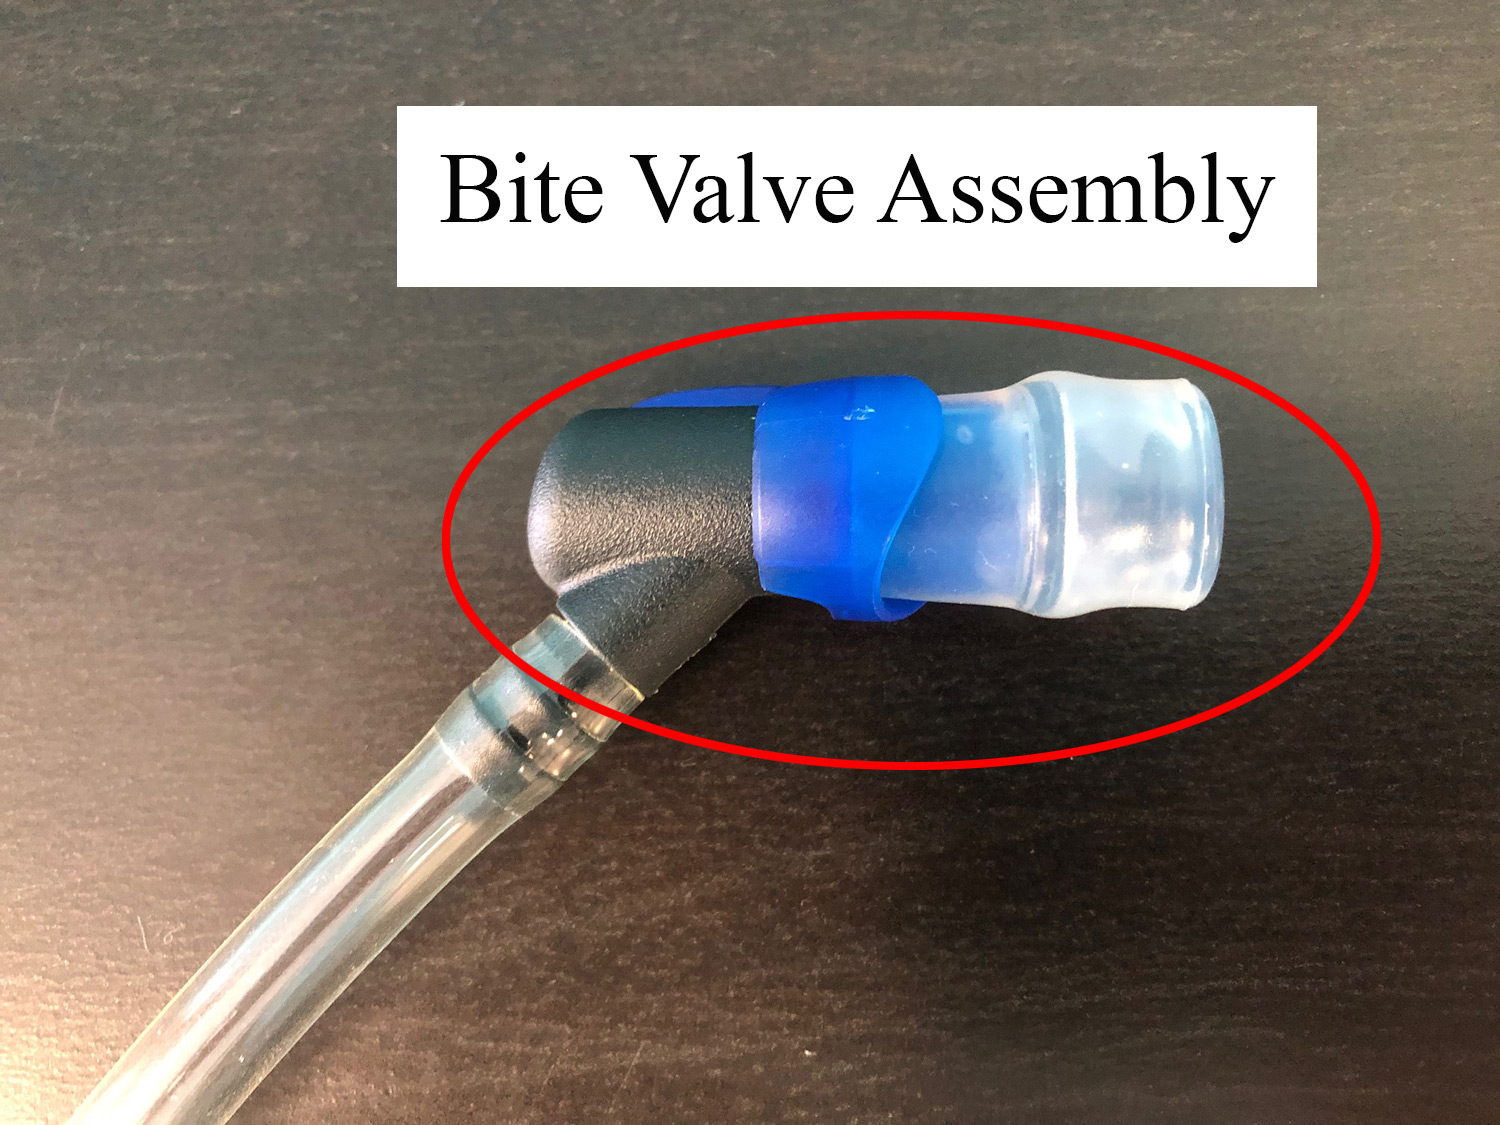
    Depending on the original problem with the bite valve, it is sometimes necessary to replace the entire bite valve.  We define the bite valve as the complete assembly located at the end of the tube. This includes the hard plastic body and the soft biting material (known as a sheath).
     

    Bite-Valve-Assembly.jpg

    1. Remove the bite valve from the tube

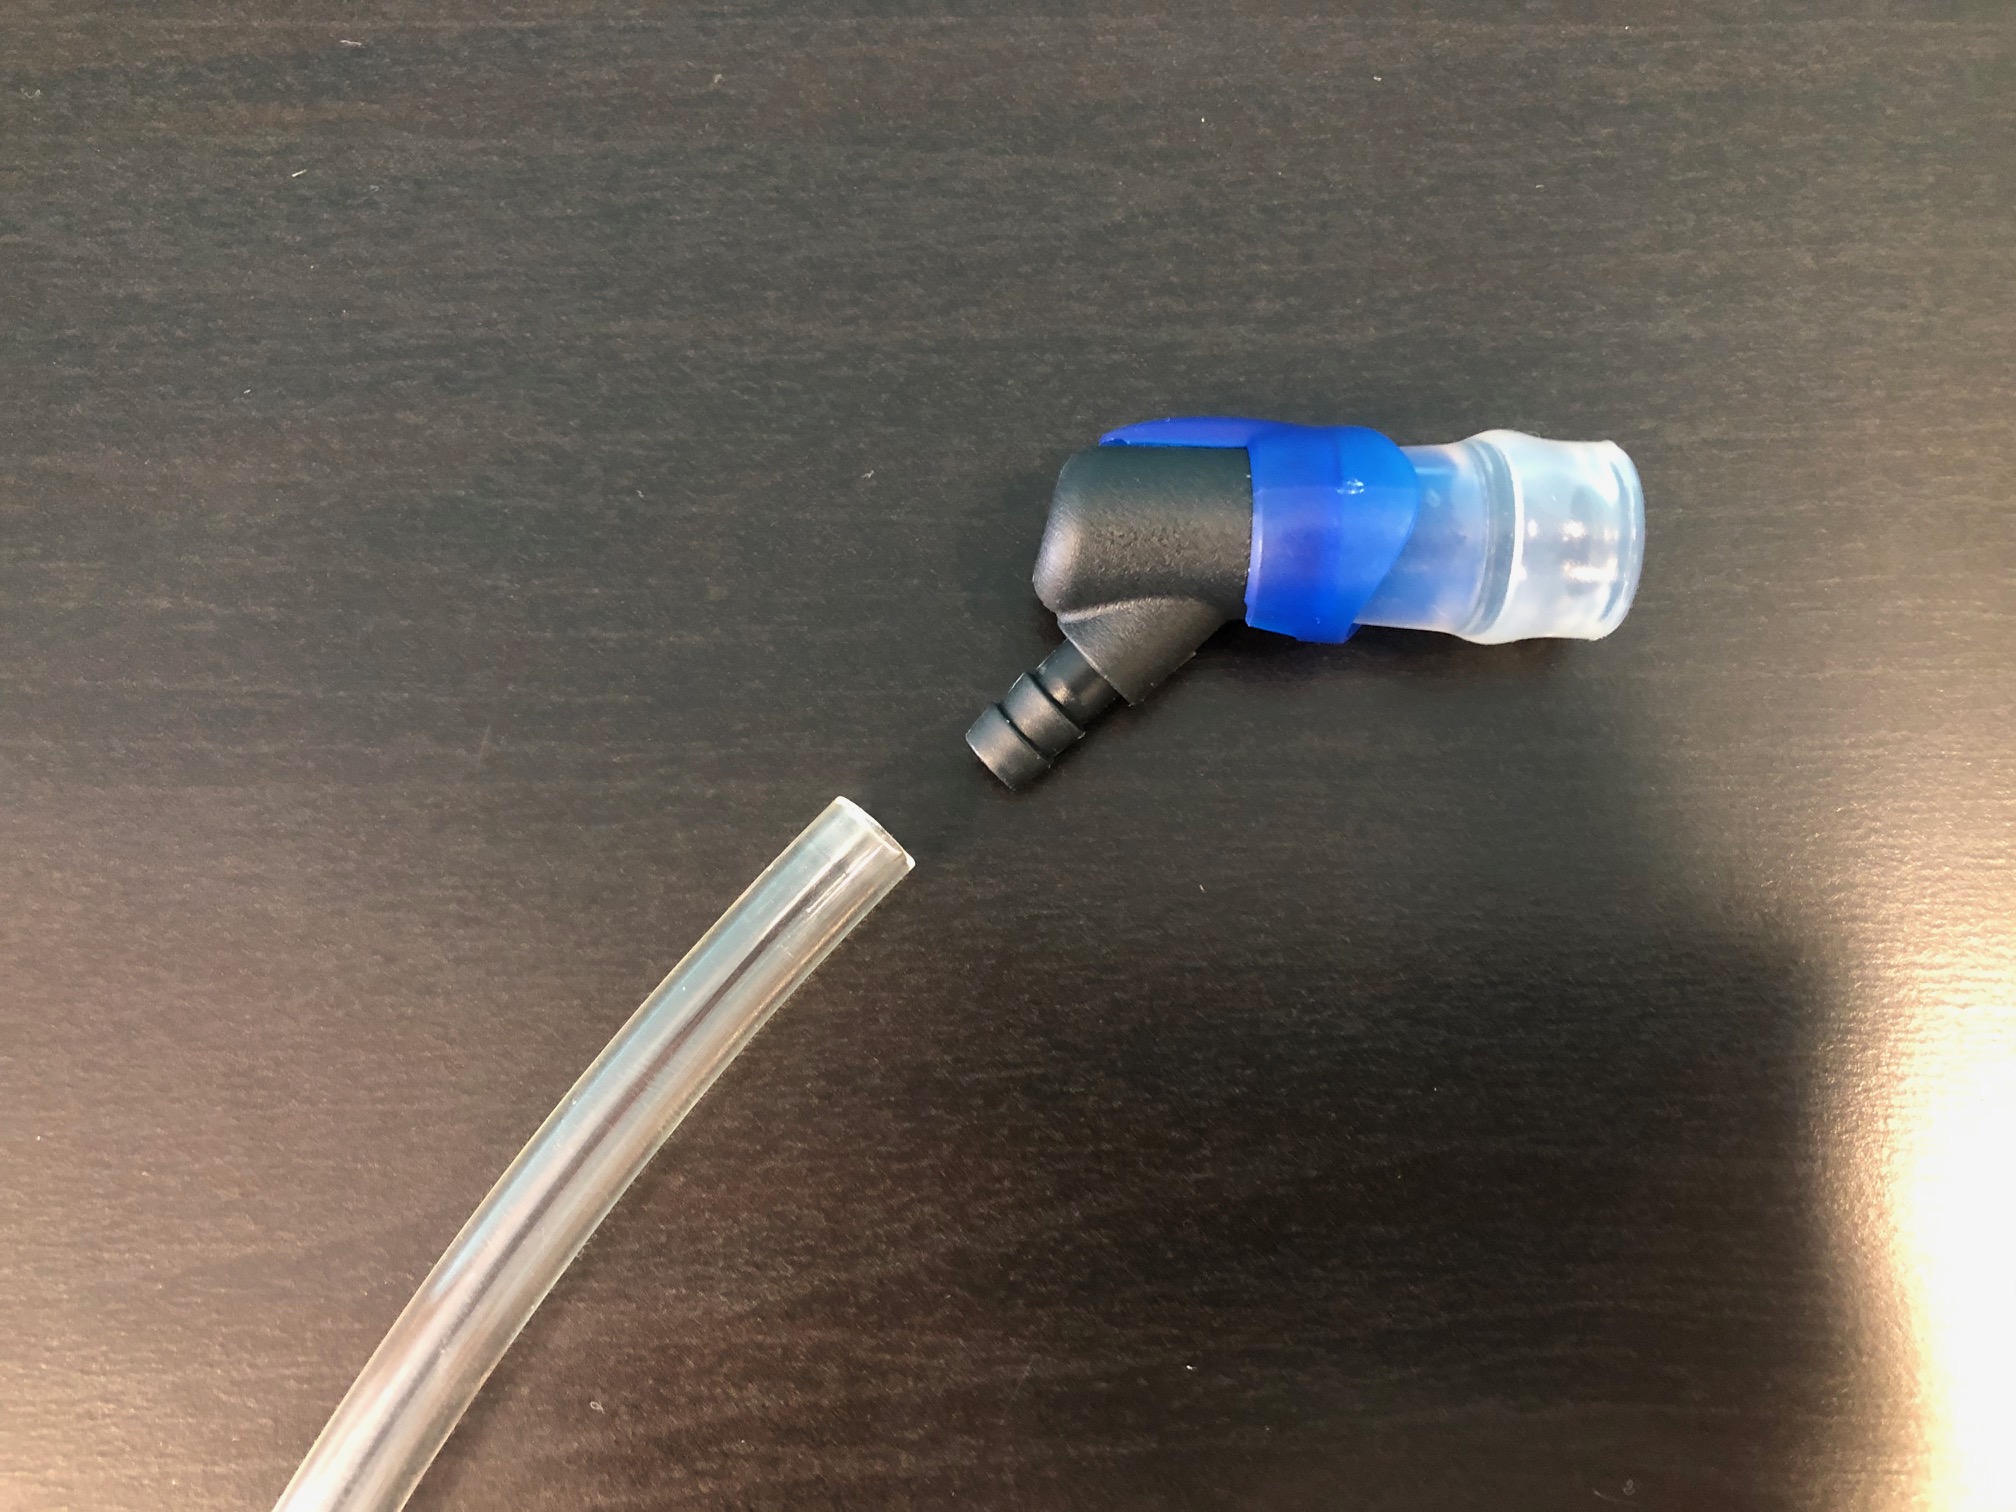
    The bite valve assembly needs to be removed from the tube. There are barbs that hold the bite valve inside of the tube. Grasp the tube in one hand and grab the bite valve plastic body in the other hand and pull firmly. The bite valve will pull out of the tube.
    IMG_8777.jpg

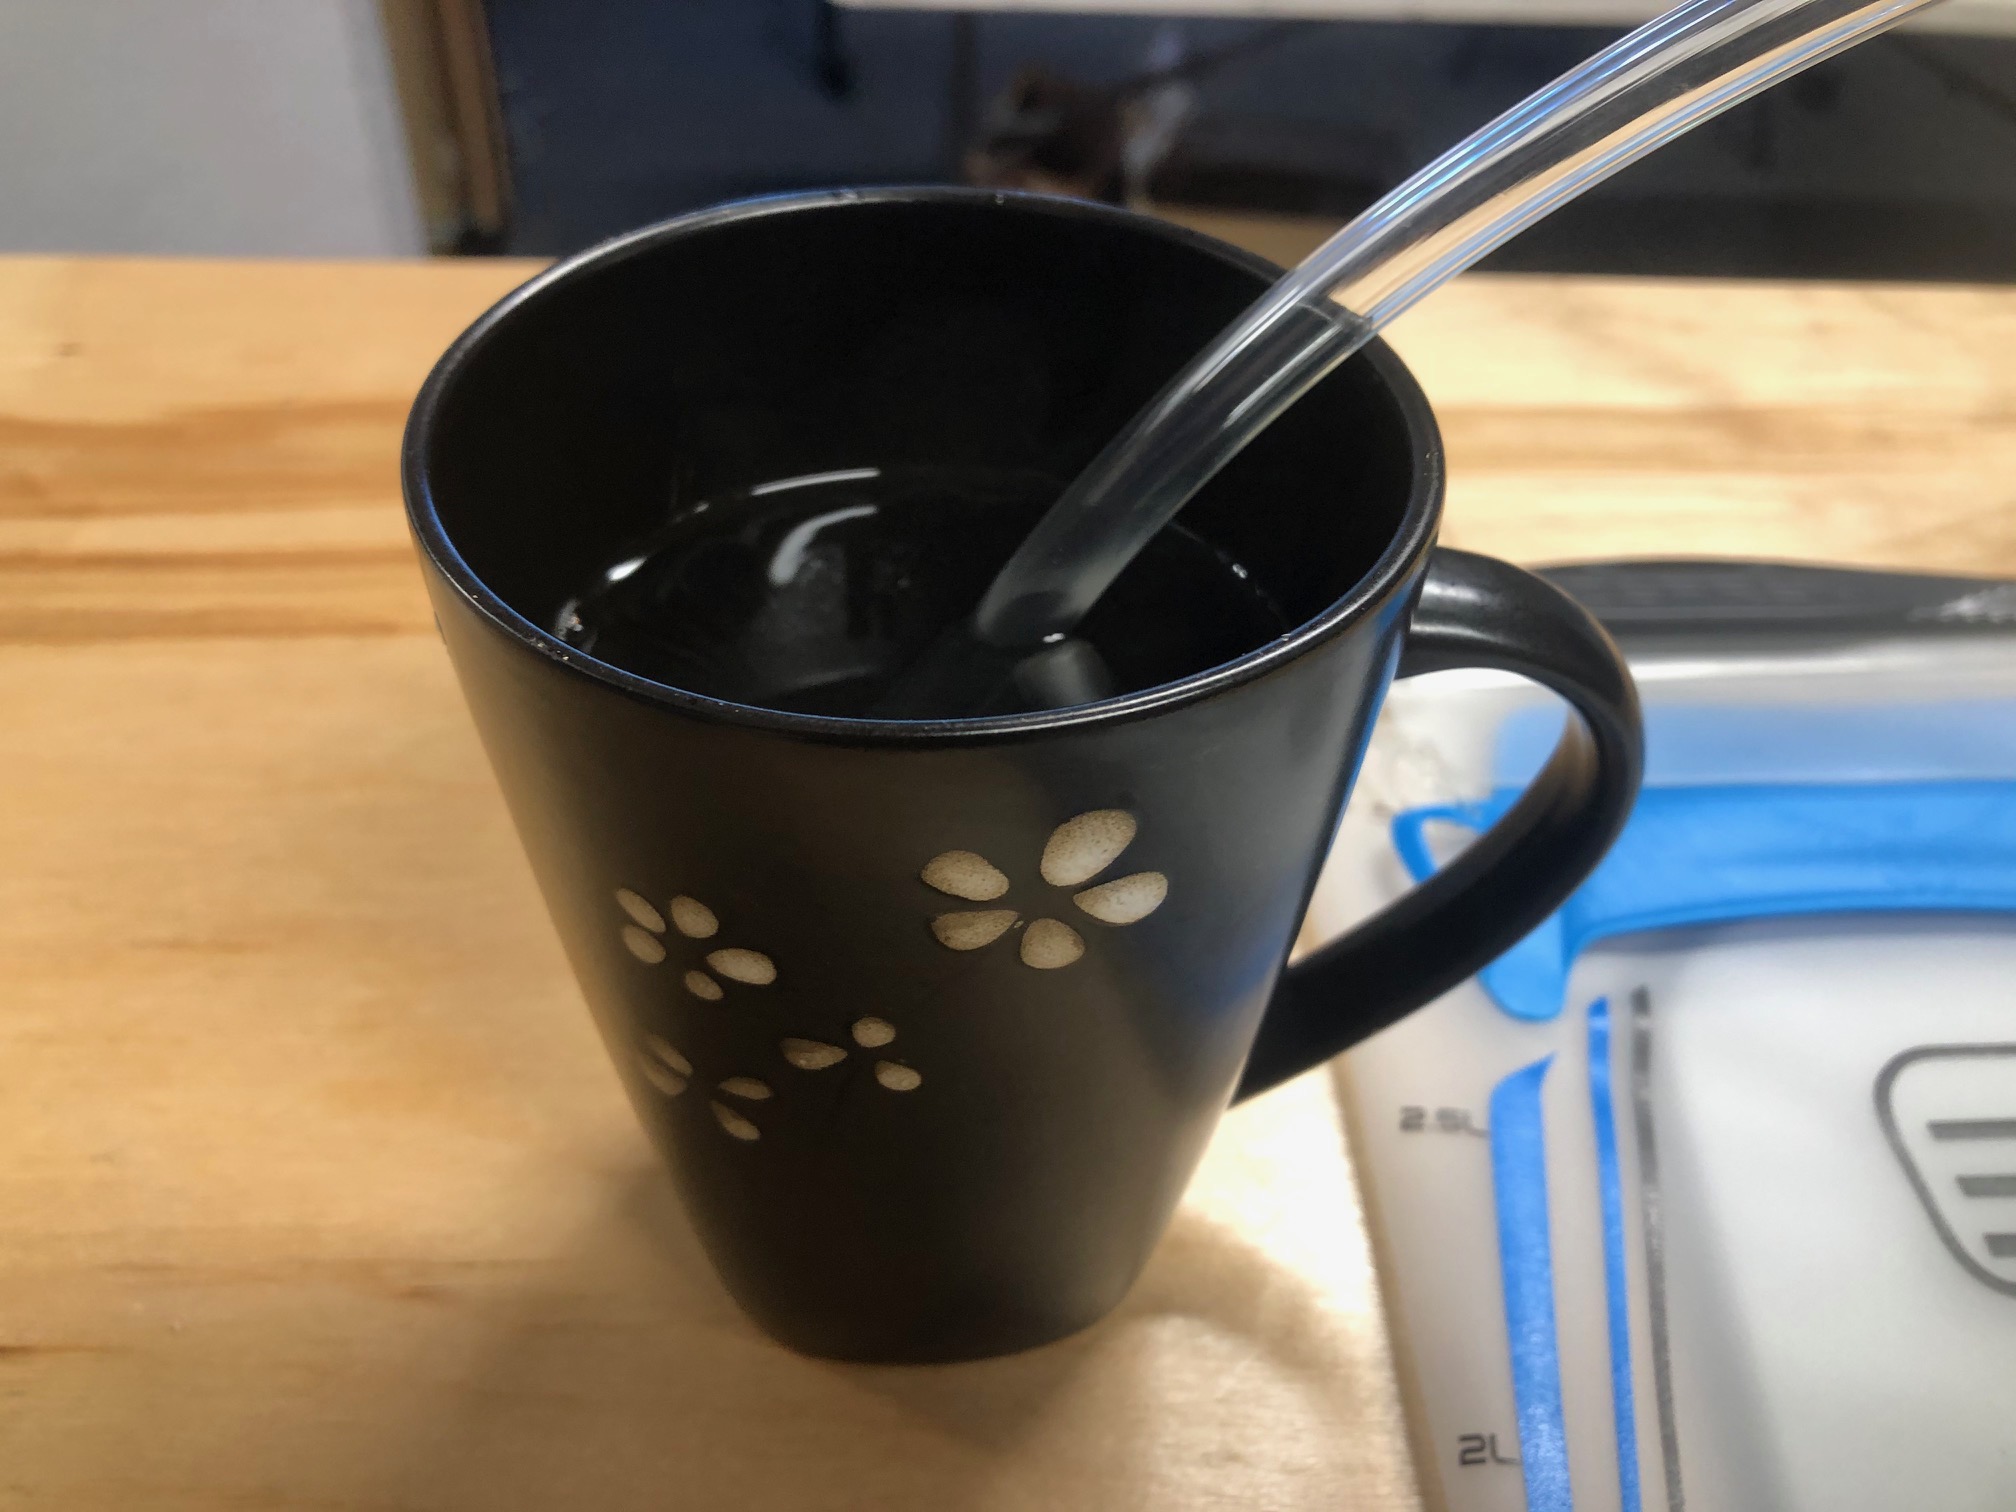
    Sometimes bite valves can be difficult to remove. If this is the case, heat water up to 170 F / 77 C and place into a coffee cup. Place the bite valve and end of the tube into the cup and let it sit for 30 seconds.
    IMG_8773.jpg

    Once the hose is heated up, the bite valve can be pulled out of the tube. Be careful, as the plastic will be hot. We recommend covering the end with a towel and then grasping the bite valve assembly firmly and then pulling it out of the tube.

    2. Install the bite valve.  Normally, you can press the new bite valve into the tube without any problem.  If you find it is difficult to press into the tube, use the hot water method above to heat up the tube and then press the bite valve into the tube.


    Softflask Bite Valve, Sheath Replacement

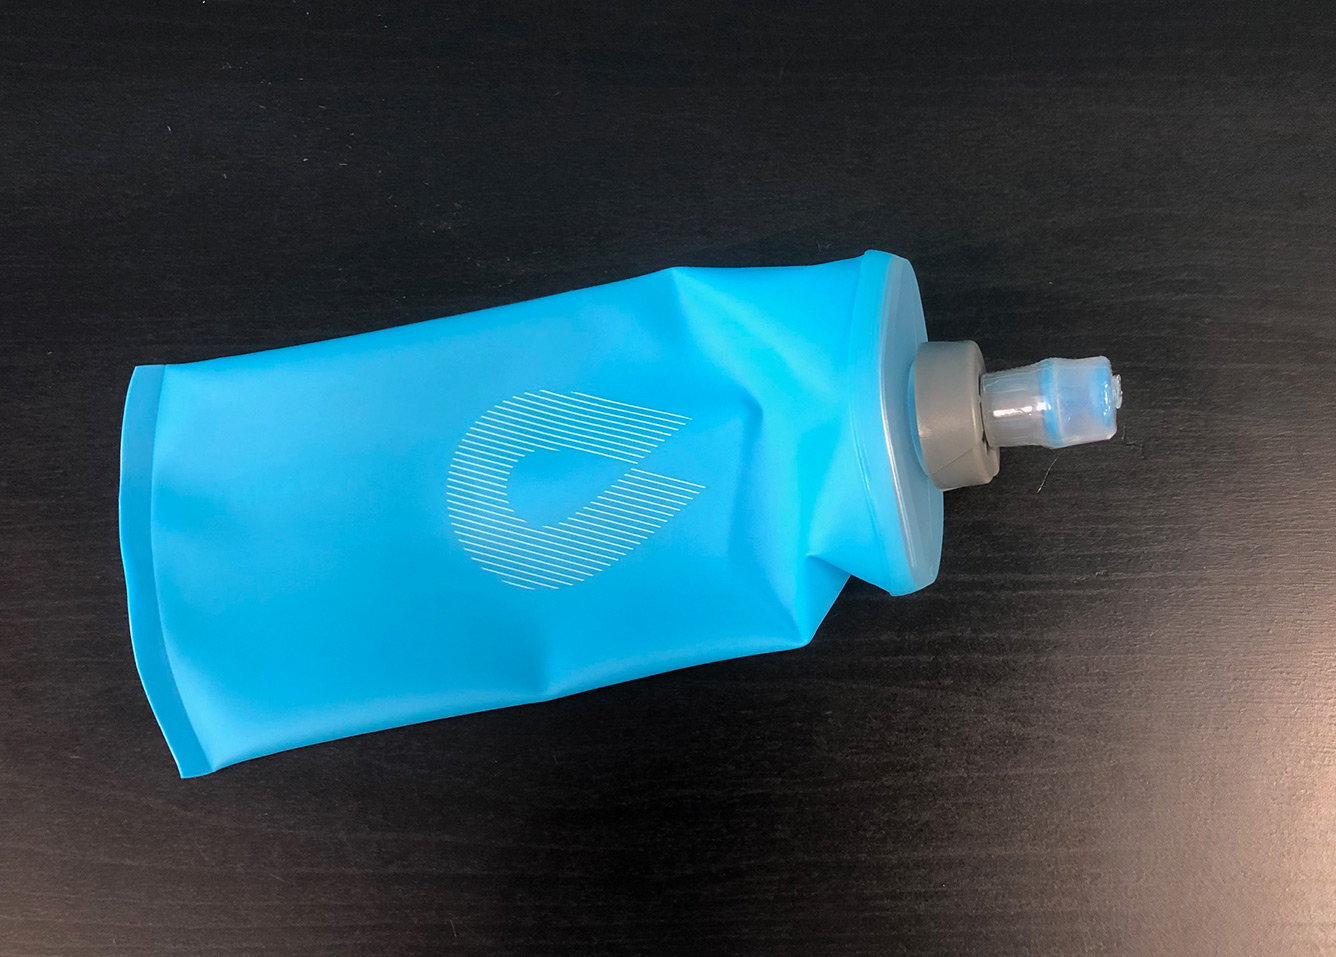
    Much like a sheath replacement on a reservoir, the sheath replacement on a flask is quick and easy.
    soft-flask-close-up.jpg

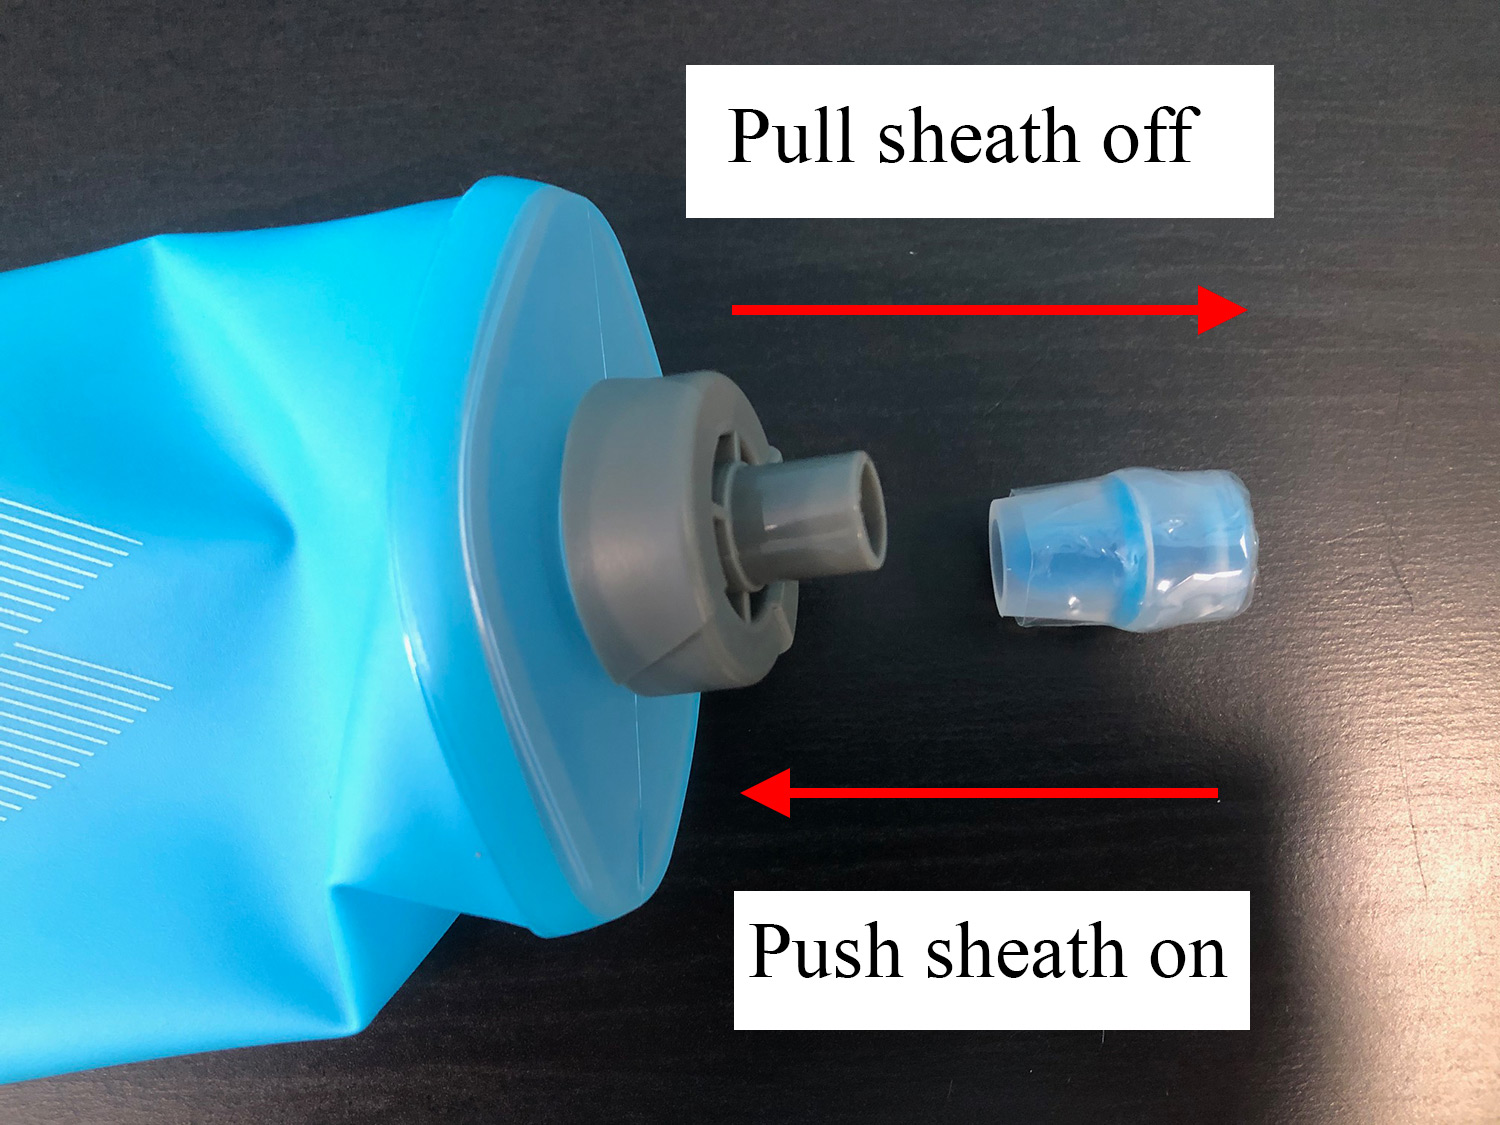
    1. Remove the old sheath by pulling it straight off of the flask. You may need to wiggle it back and forth.
    wax-on-wax-off.jpg

    2. Install the new sheath by pressing it onto the softflask.


  • What if I have a Bad Taste when I take a drink?

    As a leading provider of performance hydration, any issue with our product is taken seriously. Since 2001, our products have been made with a food-grade Thermoplastic Polyurethane (TPU) material that is safe, reliable and non toxic. TPU is used and recognized by many of our competitors and is an industry standard for its food-safe properties and its durability. It’s 100% BPA and PVC free: every one of our products meets or exceeds the most rigorous national food safety standards in the world. 

    Although TPU is a safe material, there is a small percentage of consumers that experience an unpleasant taste when using their flask or reservoirs.

    In order to address this inconvenience, we gathered a few options that have worked for us and our customers.

    Option 1: Fill the vessel with water and add a few drops of lemon juice (about 1 teaspoon). Place the vessel in the freezer and allow it to freeze completely overnight. Once frozen, remove the vessel and allow it to thaw out completely. Pour the lemon water out and rinse. This should diminish the taste.

    Option 2: Fill the vessel up with milk (powdered milk works as well) and place it into the refrigerator for 24 hours. Then completely clean and dry the vessel.

    Option 3: Use 1 or more Bottle Bright tablets (depending on how large your vessel is) and soak it with warm water for 30+ minutes. Empty and rinse the reservoir or vessel, scrubbing it with a bristle brush. Rinse once more, completely and let dry fully prior to using.

    Option 4: For those that are extra sensitive to taste, we recommend using a drop or two of lemon juice in the reservoir or container during activity. 

    If these solutions do not work for you, please let us know and we will be happy to send you a replacement. Please file a warranty claim here.


  • How do I clean my reservoir?

    HydraPak reservoirs are top-rack dishwasher safe, and most turn inside out so they dry completely. Clean after each trip, and always dry fully before storing to prevent mold.

    Elite, Force and Velocity

    1. Reach inside, grab the bottom and pull it back out through the top opening, like turning a sock inside out. You can flip the molded opening too.
    2. Wash on the top rack of the dishwasher, or by hand with warm water and mild soap.
    3. Leave it inside out until completely dry.

    Shape-Shift

    1. Unlock the removable baffle.
    2. Turn the reservoir inside out and wash on the top rack or by hand with mild soap.
    3. Leave it inside out until completely dry.

    Contour

    The Contour turns inside out like our standard reservoirs, but its internal baffles don't separate. For the best clean, use a bottle brush, Bottle Bright tablets, or both.

    • Brush: fill with warm water and a little mild soap, scrub with a bottle brush, rinse well.
    • Bottle Bright: fill with warm water, drop in 1–2 tablets, close the slider and let sit 15–30 minutes. Rinse well.
    • Dry: hang it inside out until completely dry.

    Drink tube and bite valve

    1. Disconnect the tube from the reservoir.
    2. Pull the bite valve firmly off the end of the tube.
    3. Slide the silicone sheath off the valve. Clean it with Bottle Bright or mild soap and water.
    4. Scrub the inside of the tube with a HydraPak Tube Brush.
    5. Let everything dry, then put the sheath back on the valve and the valve back on the tube.


  • My slider top is difficult to move - what can I do?

    Two quick fixes usually solve it:

    1. Don't overfill. Filling past the max fill line puts pressure on the slider. Leave a little room and it slides more easily.
    2. Lubricate the tracks. Rub a small amount of food-safe silicone, glycerin or beeswax along the tracks. Avoid cooking oils, which get sticky. See lubricant tips.
  • Can I glue or patch a leak?

    We don't recommend repairs.  Most glues aren't food safe and a patched flask or reservoir can fail when you need it most, like on a multi-day trip.  Fill out a warranty claim form and we will send you a replacement.  

  • How do I remove the valve on my squeeze water bottle cap?

    Our caps are dishwasher safe, and the valve comes out for easy cleaning.

    To remove the valve:

    1. Take the cap off the bottle and open the valve.
    2. Turn the valve until the dot on the valve lines up with the dot on the cap. It may take a little extra pressure to turn.
    3. Once the dots line up, the small “wings” on the valve slide under the cap’s sidewalls. Pull the valve straight out.

    To replace the valve:

    1. Line up the dots on the valve and cap.
    2. Push the valve in until it’s closed.
    3. Twist clockwise to lock it in place.


General Questions

  • How do I know when an out of stock item will become available?

    On the product page click "notify me when available" and enter your email.  Once the product becomes available you will receive an email notification.  


  • Can I return something I bought on Amazon or at a retailer?

    No.  Contact the retailer that you originally purchased your HydraPak product from for instructions.  

  • How do I make a return for an order placed on Hydrapak.com?

    You can return unused items in their original packaging within 30 days of purchase for a refund.  Place your order number on a note in the package and ship it back to us at your own cost to:

    HydraPak Returns

    2605 Trade Centre Ave

    Suite D

    Longmont, CO 80503.  

    We will issue you a refund within 3-5 business days after we have received it.  Your original shipping costs will not be refunded.  

  • What to do if I received the wrong item?

    Warranty: Reply to your original warranty email with a photo of what you received and your packing slip and we will be sure to send you the correct one right away.  

    Website: If you placed an order on the website and received the wrong product send us an email with your order number and a photo of what you received and we will send you the correct item quickly.  

  • How do I Open and Close the Recon Half Twist Top Cap?

    The Recon Half Twist cap opens and closes with a half turn, so you can drink without fully removing the lid.

    1. To open: hold the bottle and turn the top section of the cap a half turn counterclockwise until the spout opens.
    2. To close: turn it a half turn clockwise until it stops.
    3. To fill or clean: unscrew the whole cap from the bottle.

    Watch our video to see it in action.


    Recon_Top_Cap_Operation.jpg


  • How do I Open A New Reservoir?

    New reservoirs are sealed tight and can take some force to open the first time. After that, they open easily.

    1. Remove the slider. Grip the slider top and pull it off sideways, toward the closed end.
    2. Flip the flap up.
    3. Grab both handles. Slip two or more fingers under the front handle and two or more under the rear handle.
    4. Pull apart. Pull the handles firmly in opposite directions. Don't be shy. Our reservoirs can take it.

    1.  Remove The Slider Top

    Grasp the slider top firmly and pull to the side.  The slider is directional so be sure to pull towards the closed end of the slider.

    IMG_6565-edit2.jpg

    2. Flip The Flap Up

    IMG_6567EDIT2.jpg

    3. Locate The Front Handle

    Locate the front handle and place 2 or more fingers underneath.

    IMG_6569EDIT.jpg

    4. Locate The Rear Handle

    Look at the back of the reservoir and locate the handle, then place at least a couple of fingers underneath it. 

    IMG_6571edit.jpg

    5. Pull The Handles Apart From Each Other

    With a firm grasp of both the front and rear handles, pull the two handles apart from each other in opposite directions.  A fair amount of force may be necessary so pull hard.  Our reservoirs are tough.  They can take it!

    IMG_6573edit.jpg

    Voilà! Still won't open? Contact us and we'll help.


Still need help?


Our Support Team is here for you